As someone who likes to know what she's about to eat, I love the adorable flags on these sandwiches. What else could I put flags on? Dinner tonight? Maybe.


 From "Church Spring Party 2008" from Oh Happy Day.

"Napkin Rings
With just a few changes, these follow the same steps as the hanging pom-poms.
1. Stack four sheets of tissue. Cut a 10-by-5-inch rectangle, going through all layers. Make 3/8-inch-wide accordion folds.
2. Fold an 18-inch piece of floral wire in half, slip over center of tissue, and twist to secure. Trim ends of tissue.
3. Separate layers, pulling away from center one at a time.
4. Bend wire into a loop to fit around napkin, and twist end around loop to secure."
 Oh, how I love the swing in the bedroom. It's unexpected but yet still cozy. It needs a good view though. Something's Hiding in Here is lucky to have a wall of floor-ceiling windows that her swing looks out over.
 Melissa's DIY Crib Project from Design*Sponge's DIY Contest.
Wood and hardware: $80
High density foam: $10
Bumper pad kit: $15
1 yard of oilcloth: $6
3 yards of decorative cotton fabric: $15
First, we went to the hardware store and bought all of our supplies; 3/4 inch plywood for the base, 1″x3″ boards for the frame for the base, casters, 1″x2″ boards for the external framework, 1/2″x6″ and 1/2″x8″ boards for the slats (slats should be placed no more than 2 3/8″ apart and none should be loose or missing) and two solid wood pieces to close the front and back of the crib (please see note below). If you plan on doing this project or something similar, you’ll want to draw out detailed plans ahead of time and bring a calculator with you to the hardware store to figure out quantity. Remember that lumber is labeled according to its PRE milled size, e.g. a 1×3 is really 3/4″x2 1/2″.
After cutting out the base to size, I reinforced the bottom with 1″x3″ boards cut at 45º angles at the corners. Then I cut out notches to fit the 1″x2″ boards to make the vertical frame. After cutting all of the vertical boards to length, I cut notches out of the top of the 1″x2″ boards for the cross bars. Before assembling everything, I sanded all of the wood until smooth (all wood should be sanded completely smooth and constructed without lips or overhangs that may catch baby’s clothes), then applied a few coats of child-safe wood finish (ask your local hardware store for non-toxic options available). Once assembled, I added the finishing touches of white paint to the exterior.
[PLEASE NOTE: Crib slats or spindles should be spaced no more than 2 3/8″ apart, and none should be loose or missing. In addition, the back and front of a crib should always be solid with no decorative cutouts. If you follow these instructions you’ll need to use additional wood to completely close each end of the crib]
I used the bumper pad kit (found at JoAnn Fabrics), and cut the pads to fit the dimensions of my crib/co sleeper. Bumpers should never be thick or pillow-like, if you choose to use them make sure they are thin and are removed when the child is old or large enough to stand (they can be used to climb out of the crib and there is a recorded risk of suffocation). I followed the pattern provided in the kit, making the appropriate adjustments to fit our crib design. For the mattress, I used a high density foam cut to fit snugly in the crib frame and to be no less than 26″ below the crib sides (if you can fit two fingers between the crib and the mattress the mattress is too small). Once it was cut to size, I made a cover for it by measuring the dimensions plus half the thickness of the pad, plus seam allowances. I inserted a zipper to the cover to allow for easy removal.
[PLEASE NOTE: the photo above was arranged and styled for a photoshoot. Cribs should always be placed away from windows to prevent children from potential danger with cords, curtains or blinds]
[PLEASE NOTE: Bumper pads have been linked to infant suffocation in some cases. The American Academy of Pediatrics suggests that, if you decide to use thin, non-pillow-like, bumpers you remove them when the baby begins to stand]"
 Modern Monthly Photos from Apartment Therapy: OhDeeDoh.
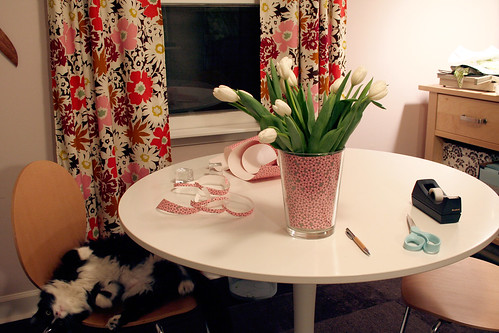
 Patterned Vase by Making It Lovely.
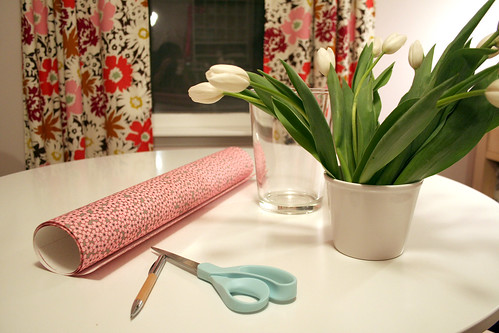
My flower pot only went about halfway down, so I trimmed my tulips to a length that would look good when they were set inside the larger vase.
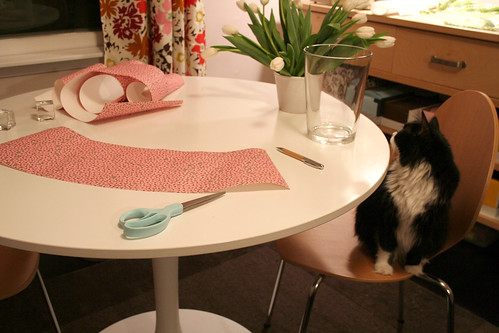
I set the vase on its side, and rolled it along the paper, tracing the top and bottom arc with a pencil. Then I cut out the shape while Violet watched. :)

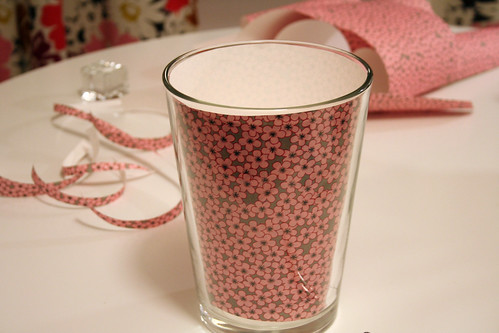
I set the paper inside the vase to check for fit. It was a little tall, so I just traced around the top with a pencil and then trimmed it down.
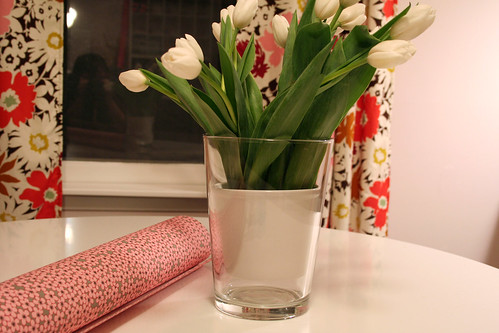
I set the smaller container inside, and that’s it! A simple, quick project."
 Leather Case from the Blueprint blog.
