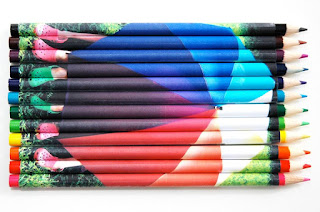
 Photo Pencils, tutorial by Photojojo.
I'm adding this to my stash of cool, creative gifts from photos. Might be a great present for my littlest cousin.
"Step 1: Print your photo
Choose a photo that doesn’t have too much fine detail. Portraits work well, as do landscapes.
Using your favorite image editing software, crop your chosen photo to 5×6 inches.
Print 3 copies on plain (not photo) paper.*
*If you don’t have a computer and/or printer, you can use 3 copies of a 5×7 photo. However, the stiff photo paper will be harder to wrap around the pencils. You might try wrapping the strips around the pencils, securing them with rubber bands, and leaving them overnight before trying to glue them in place.
Step 2: Mark the back of the photo
 Divide the photo into four 1.25 inch wide sections (lengthwise), using a pencil and ruler.
Step 3: Cut your photo into strips
 Cut along the three lines you just drew to slice each photo in four.
You should end up with three identical copies of each strip. You’ll use strip A for the first three pencils, strip B for the next three, and so on.
Step 4: Apply glue to the back of each strip
 Apply glue to the back of the first strip, being careful not to get any glue on the front of the picture.
Step 5: Wrap the strip around the pencil
 Attach a piece of tape to the front of the strip. The tape should be as long as the strip; you’ll use it to tape the free edge of the strip down once it’s wrapped around the pencil.
Wrap the strip lengthwise around your first pencil. (We found it easiest to place the strip on the table, put the pencil on top and roll.) Tape down the free edge of the strip.
Step 6: Lather, Rinse, Repeat
 Repeat the process for the rest of the eleven strips and pencils.
Now line up your pencils, and rotate them so that the picture aligns across the row of pencils.
Is that cool or what?"


1 comment:
Wow, those are cute.
Post a Comment