
 Round and Round Party from DesignMom.
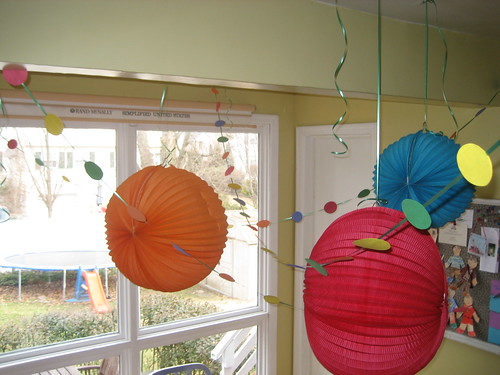
Oscar's birthday party looks so cool. So simple, but yet so very fun. Instead of licensed characters or even the obligatory princesses/trains, Oscar's mom hits the nail on the head. Every 3 year old loves circles!
Circle garlands punched from construction paper. Round paper lanterns. Circle confetti on the table.
 And then of course, all of the food was round as well. Round pb&j, cucumber & carrot rounds, circle crackers and pineapple rings. And then of course, cupcakes with round sprinkles.
  The favors were super bouncy balls wrapped in cellophane. And the activities: "Danced to "You Spin Me Right Round, Baby Right Round". Walked around a hula hoop while singing "The Big Black Bear" song. Sat in a circle with our feet together and rolled a ball around." Other round games include the Hokey Pokey and Twister.


 1 Choose a plain typeface on your computer – we used Ariel – and type in capital letters: WELCOME HOME. Enlarge it to 300-point type and print out. (If your computer won’t allow you to do this, enlarge the letters on the photocopier till they are approx. 7.5cm high.) You will need three sets of type, so you have enough for spares. Cut out the letters into individual rectangles and back them with double-sided tape. Cut to shape.
 2 Take the mailing tube and measure off into 7cm wide sections. You will need at least six. These form the circle stencil and small spray booths. Cut into sections with the craft knife.
 3 Take the coir mat and place the tape around all edges. Using your tube sections as a measuring guide, create a grid with the masking tape to create 12 squares.
 4 Draw up a grid using the letters and the felt pens as a guide to the order of the letters and colours. Peel off the backing from the letters and place them in the centre of each square on the mat according to your guide. Place the cardboard tubes over the letters and spray one colour at a time. Spray remaining circles and allow to dry thoroughly. Peel off masking tape and letters to reveal the pattern.


